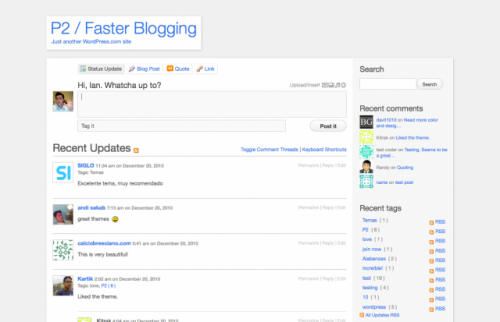
I’ve mentioned a few times already that I became a big fan of P2 theme for WordPress. I currently maintain multiple installations of it, just because it is so easy to setup and start using. I have it as company Intranet or as a project collaboration tool. It’s like a blog, a wiki, and a chat room combined together. And since I’ve installed it so many times, I thought I should publish what exactly I am doing, in case someone else will want to try it.
First, download and install the newest version of WordPress. I usually create an intranet sub-domain (e.g.: intranet.example.com) and install WordPress into p2 folder, just in case I’ll need some other tools for the company or project later. So the full URL becomes something like intranet.example.com/p2/ .
Secondly, setup an automatic redirect to the p2 folder. I usually place index.php file into the document root of intranet.example.com with the following content:
<?php header("Location: /p2/"); ?>
Thirdly, login to WordPress administration, navigate to Appearences->Themes->Add New and install P2 theme. If you are not in a hurry, play around with theme options and customize it to your liking. I usually set the site title (in Settings->General) to the company name or project title. While you are in Settings, setup the user-friendly Permalinks. I usually go for the “Day and name” option.
Now for the plugins. All of my P2 installations are private. I want only authorized access, period. I also want to make it easy for the registered users to utilize the P2 front-page posting functionality, rather than get confused by the WordPress administration interface. Here are the plugins are usually install:
- Private WP Suite – allows me to close down the WordPress installation for the general public. It will require people to login before they can see anything on the site at all. I also configure the plugin to protect the file uploads, and disable RSS feeds. The RSS bit sounds annoying, but it’s not. People usually end up with having the intranet always open in the browser tab. So they see all updates coming in straight away. It would be nice if there still was an RSS feed with a private key of some sort.
- Peter’s Login Redirect – redirect users after login to the site’s front page, rather then into the administration interface.
- Global Hide/Remove Toolbar Plugin – hide the administration toolbar by default. Those who need it can still enable it their user profile page.
- Lightbox Plus – when installed, will make nice larger image popups when images are embedded in the posts.
- P2 Likes – optionally, if you want to give site users the functionality of up-voting some posts, install this plugin.
We are almost done. That’s configure the sidebar widgets now. Of course, it all depends on what you’ll need and how you plan to use your site, but here is my starting point:
- Search. This will bring the search box at the top of the right sidebar – quick access to all posted information.
- P2 Recent Comments. Having this widget always visible on page load helps promote discussions.
- P2 Recent Tags. I find it very helpful in navigating to recent posts, as well suggestive to users on how to tag their postings.
- Archives. Access to posts by month is more useful than by category, since by default in P2 all posts will go to the default category and not many people will categorize posts. Tags are your friends, categories – not so much.
- Meta. This is especially important for those installs that hide administration toolbar. Meta provides the direct link to the site administration for those who need it.
After I arrange those widgets, I usually do a few custom ones. Here are the most common ones:
- Twitter updates. Usually all companies and projects have a Twitter account with frequent updates. I find that it’s handy to show those updates in the sidebar, especially if there are several people tweeting. It keeps everyone up-to-date.
- RSS feed. Most of the projects that I have P2 setup for are being developed on GitHub (private repositories). GitHub provides private RSS feeds, which I use for the sidebar. This is useful again to keep everyone up-to-date, and to have a quick way of checking when were the latest changes done.
- Custom menu. This is super handy for all sorts of shortcuts. For instance, you might be using ‘bug’, ‘feature’, ‘todo’ tags and then create a custom menu (through Appearence->Menus administration) that would link to those tags. With that you’ll have a quick access to all posts tagged with specific tags. Or you could use ‘for-user1’, ‘for-user2’, ‘for-userN’ tags when you want specific posts associated with specific users of the site. Then you could have a custom menu with all ‘for-*’ tags. Users will have a quick way to see who’s given what. Or you might just have a list of frequently accessed Google Docs, like API reference or General Ledger – create a menu with links to those documents and add it as a custom menu widget. The possibilities are endless.
All you have to do now is add your intranet users. Create them Users->Add New, set their access level to Author, and suggest to them to setup their Gravatar, so that everybody could see their picture next to their posts and comments.
That’s all. You are done. Enjoy!

